Developer Insights #14 - Parts Creation
Hello! My name is Chris Adderley, a designer on the KSP2 team. If you’ve been around the community for a while, you may recognize my alias of Nertea from a few mods for KSP1 I have made. Almost a year ago I moved over to game design for KSP2 and I’m here to talk to you about my key area of responsibility and joy… PARTS. Parts are great, and while KSP2 is made up of Kerbals and a bunch of physics/engineering driven systems, one of the main ways the player interacts with the game is with the library of parts that you assemble into a vessel and then fly off into the sunset or ground.
For those new to KSP, this is a part:
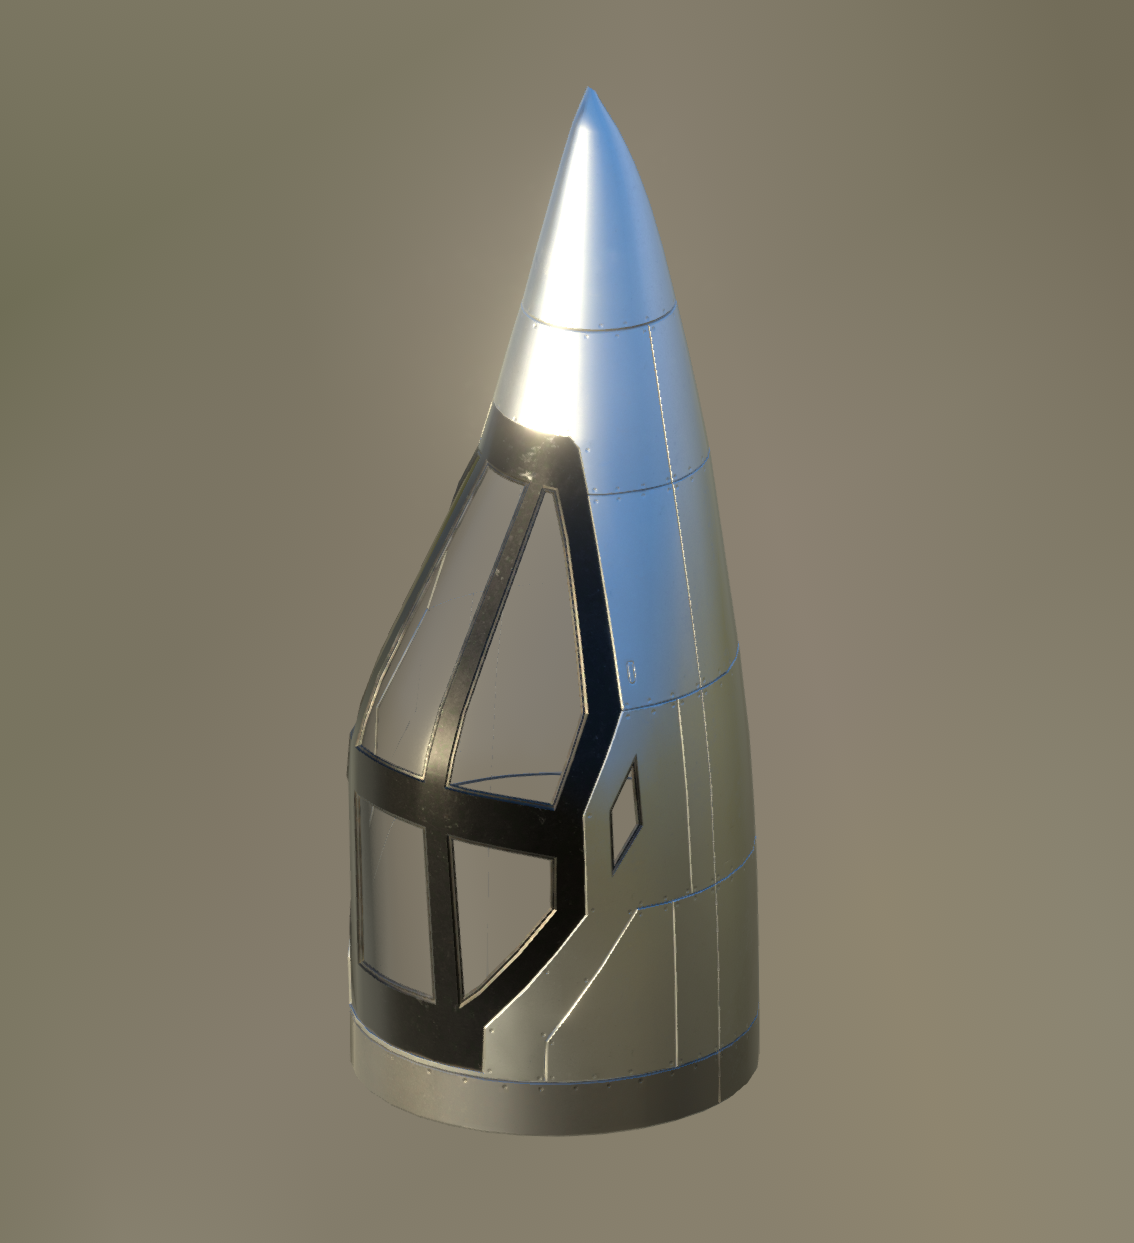
It does get a little weirder. In case you’re curious, this asteroid is also a part:
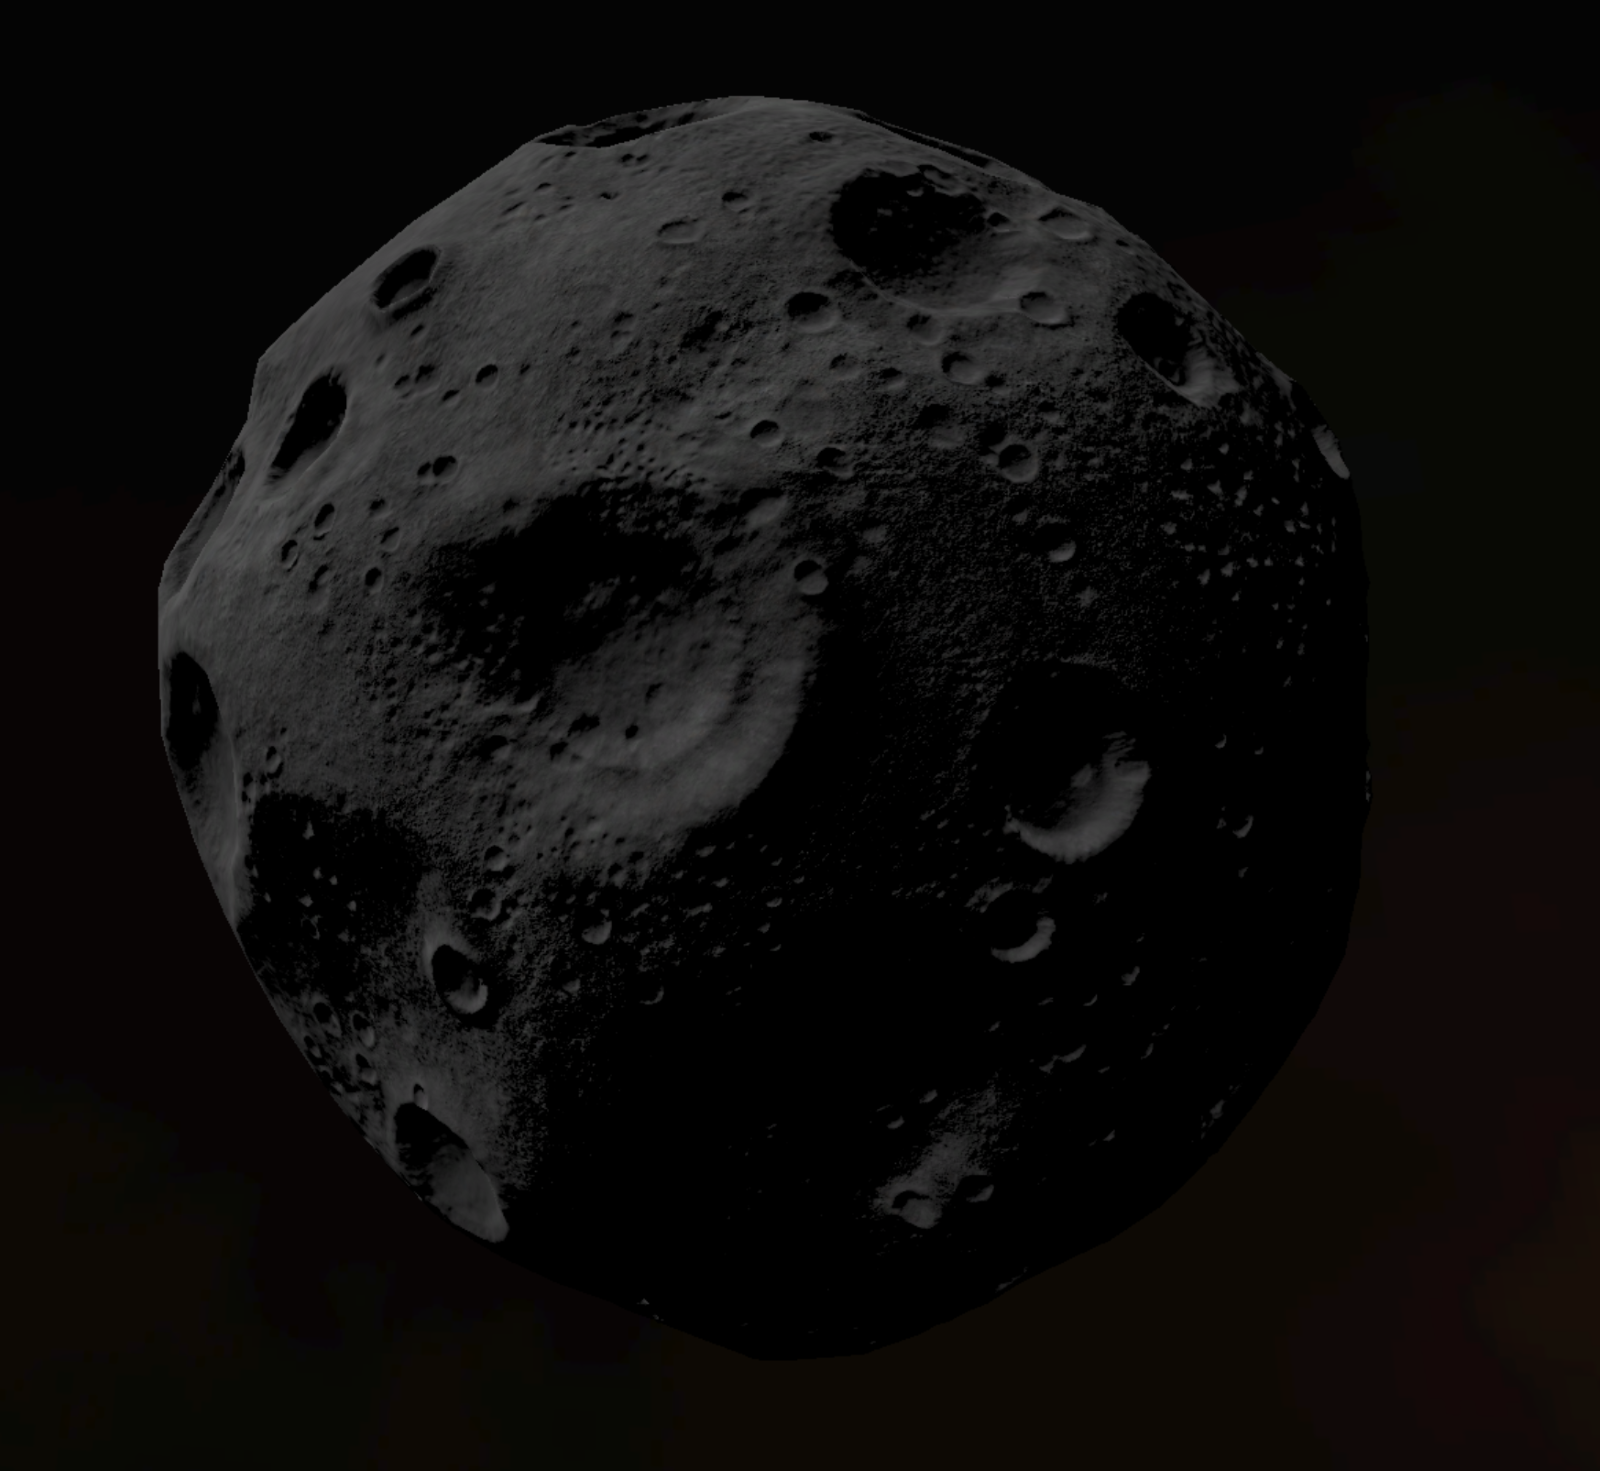
Games are strange.
With KSP 2 on the horizon, it might seem odd to talk about developing new parts from square one. However, KSP is such a complex set of interacting systems that through iteration and testing, the team often finds areas where the game could benefit from a new part (or two, or three). In addition, we have a long roadmap of features we want to add to the game, so looking towards the future consistently results in new parts showing up for the team to design and create. Seems like a good opportunity to go over the why, where, when, what, and who of KSP2 parts.
Why Parts?
Let’s back up a bit. Why build a new part? Ultimately, a part needs to serve KSP2’s four design pillars, which I’ll recap here with a few notes about how parts play into them:
Building cool and unique rockets: well, you’ll be doing that with cool parts that you can assemble in unique ways.
Exploring new planets: this typically requires a vessel, made of parts. You may have heard that KSP2 will have new and interesting planets that might require interesting part-related challenges.
Realistic space flight: as we develop them, we must make sure the parts we provide have a strong grounding in science and engineering.
Defining and achieving unique goals: parts should enable the definition and creation of unique missions and activities for players.
If a part doesn’t align with these needs, we are probably not excited about building it. You’ll notice that parts that have extremely narrow roles or very specific designs don’t fit into this very well, but perhaps a reality-grounded part that is very cool-looking, which enables new ways of exploring planets, with a myriad of possible unique uses might be the holy grail of parts.
Where Parts?
There are a few different places a new part could come from. Often playtesting might reveal the need for a part. This often comes from existing part families – we may find that it helps player construction if they have access to a larger, 3.75m battery. Parts that come out of this kind of need are quite common – though we already have over 600 parts in mind for KSP2, there’s always a few bare-looking part families that can use some love. Even so, new-sized parts of existing part families are not the coolest and so might not hit all four design pillars, so while we may want to do them at some point, we will prioritize other parts over them.
A missing part might also come from capability. A new, electricity-consuming part that doesn’t have useful ways for a player to power it may identify a gap in capability. Depending on whether there are other ways for a player to solve the design problem, that might identify a critical place for a new part or is something to look at down the road as a quality-of-life feature.
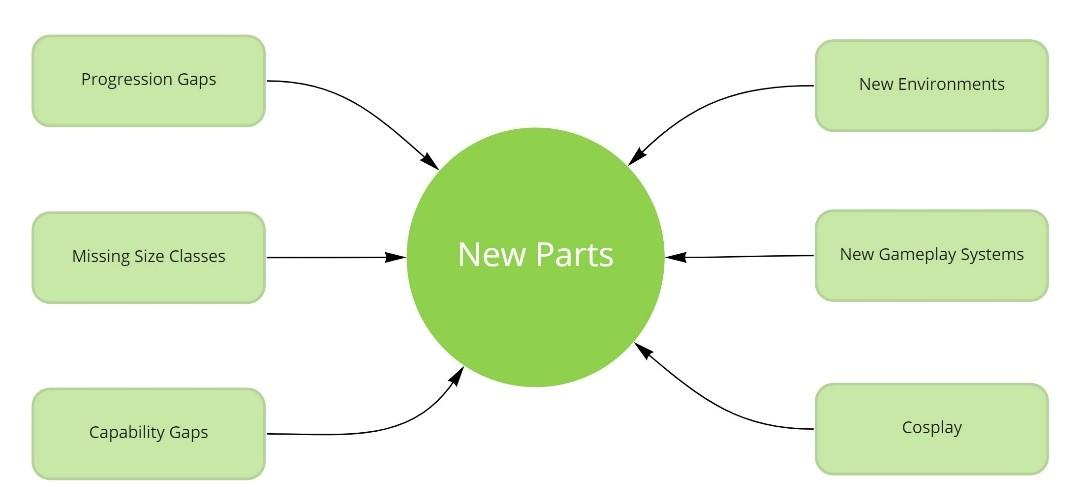
In other cases, a feature or gameplay system may require new parts to be fully realized. As a very simple example, if we want to include a new fuel type in the game, many parts are required to support it. We’ll need engines and fuel tanks at the minimum and maybe resource mining and conversion equipment. This isn’t something to be done lightly, and when bringing a new system to life in the game, we have to carefully weigh the needs of the system versus any parts (or changes to existing parts) it calls for.
The final place I’ll discuss for part sources is something we like to call cosplay. If you’re a pure power gamer, your ideal vessel might include nothing but functional parts relevant to your mission. As an aside, rocket engineers are somewhat power gamers – no space or mass is wasted on a spacecraft. Cosplay parts don’t significantly add to the core play experience of KSP but can greatly expand what players can build – consider all the inventive fan creations that have come from the humble M-1x1 Structural Panel. For KSP2, we want our players to be able to build vessels at least as cool as what the community has come up with in KSP1, and expand the range to huge interstellar ships and extensive colonies on many celestial bodies. This lends itself to a need for more cosplay parts.
When Parts?
Once the design team has decided that a part is needed, the part is added to the backlog of work we have scoped for the game. Our Production team has the ultimate say about when we will commit resources to actually designing and building the part, so cooperation is key!
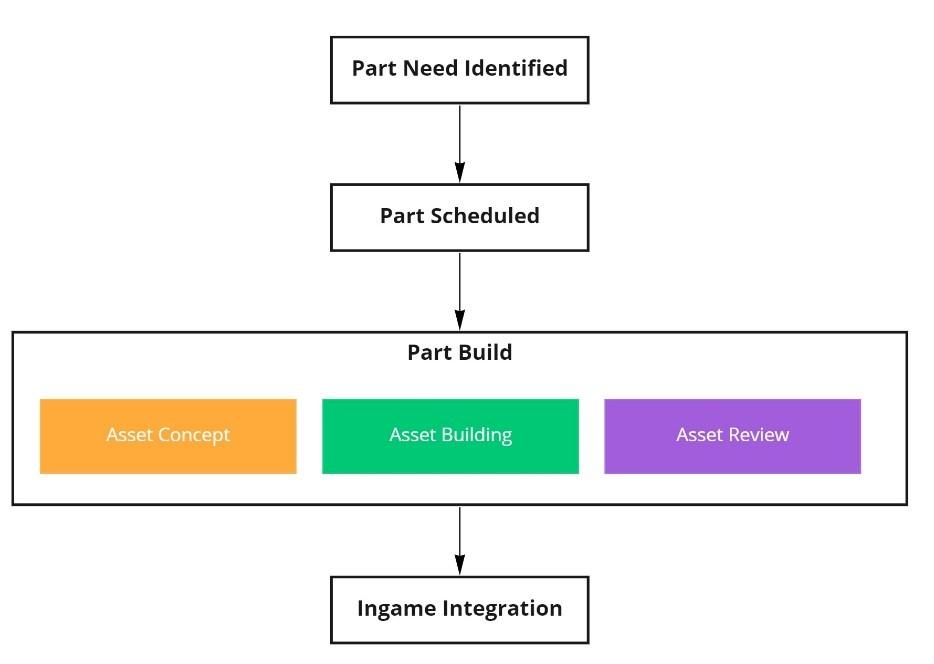
One of the important things to identify at this stage is whether we need the Engineering team to develop new technology to make this part work. That could be a new Part Module , new functionality for an existing Part Module, or even specific user experience (UX) work that we want to do to ensure the part, once it is in-game, delivers the gameplay experience we want for it. When Production is confident that the team can deliver anything the part needs, it gets scheduled for building.
What Parts?
Once we finally get down to the Part Build section, we’ve got to design it in a visual sense. For KSP2, this involves building what we call a whitebox or greybox, a 3D model that doesn’t have a ton of detail or any surfacing (it’s uh, white or grey) which is the responsibility of yours truly.
Before the whitebox really gets started, we ask some fundamental design questions that will determine some core aspects of a part, such as:
What size should it be?
How will it connect to other parts? Should we stack it? Attach it on the surface?
What part family does it belong to? What subfamily does it belong to?
What technological level does it belong to?
Does the part have any real-life analogues that will define its shape? If not, what technologies can we use to refer to this?
Sometimes it is easy to answer these questions. A basic methalox fuel tank is probably a cylinder that can stack and surface attach to parts. Its size, part family/subfamily and tech level usually depend on the fuel type it contains, and how much we want stored inside of it. There’s also a lot of real-world reference. At other times, the answer is less obvious.
We can explore some of these questions with sketches and mockups. If we really want to test how a part will behave, we can even add a blocked-out version of the part to the game to see how it feels in context to other parts.
I’m going to demonstrate this exploration by looking at a small plasma rocket engine from start to finish. This is a high tech (medium tech for KSP2) part, which follows attachment rules shared with other engines. It will draw from a mix of plasma engine proposals.
This leads up to a fairly basic shape to start off with; a cylinder on top and an expanding nozzle below. Plasma engines have very basic nozzles without most of the turbomachinery of chemical rocket engines, so we’ll try to keep the engine from becoming a mess of pipes.
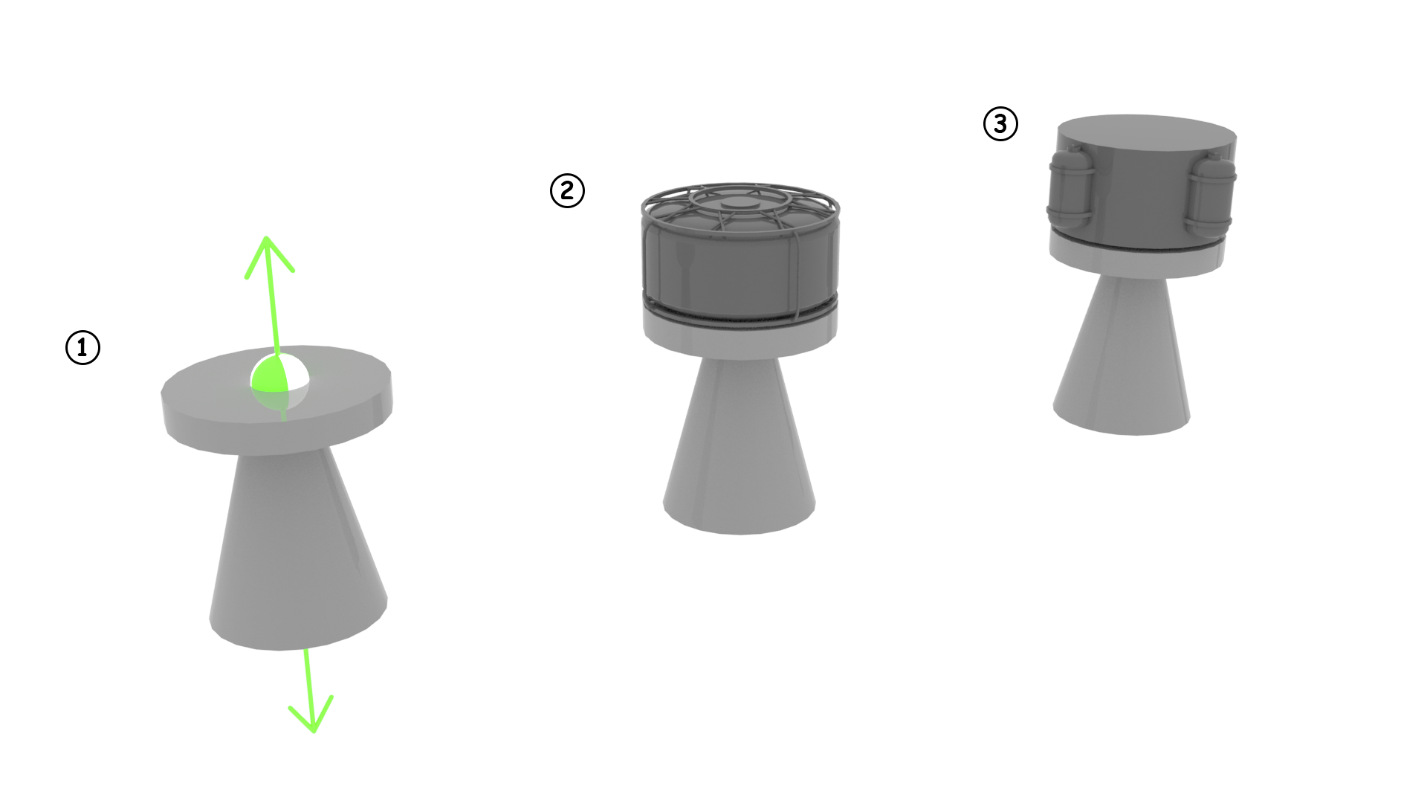
The basic shape with attach nodes in context (1) lets the parts designer feel out how this part will attach to other parts as well. We can drop in some of the parts we expect players to use (2/3) with it to see how they fit into things. This gives us what I like to call the conceptual design – the very rough look of the part, and a gut feeling that we can build it up to look really cool.
I’ve usually done some research at this point to develop the initial part concept, but here’s where the deep dive starts. Depending on the part, there could be a lot of material out there. Generally, the closer to reality a part is, the easier it is to find reference material. That can be a problem with some of KSP2’s part roster, because to our knowledge nobody has built nuclear pulse engines and orbital colonies yet! However, there are a wealth of concept studies, physics treatises and hypothetical engineering trades that have been done to propose things we might build in the future, so we can usually muddle along.

With this part, we are representing an electrodeless plasma thruster. There are a number of promising designs out there, including the electrodeless Lorentz force thruster, helicon plasma thruster, Faraday thruster, the pulsed inductive thruster and the well-known variable specific impulse magnetic rocket (VASIMR). We don’t always want to stick to exactly one thruster technology, particularly when most of these engines are basically lab models at this point. Staying away from one specific tech lets us be a little more flexible in terms of how we assign in-game statistics, and lets the artists draw from a wider set of possible concept models to create beautiful art.
Once I have a pretty good idea of the tech that’ll be used, and have done some research, I’ll do a bunch of basic silhouette conceptual studies to define the final part shape:
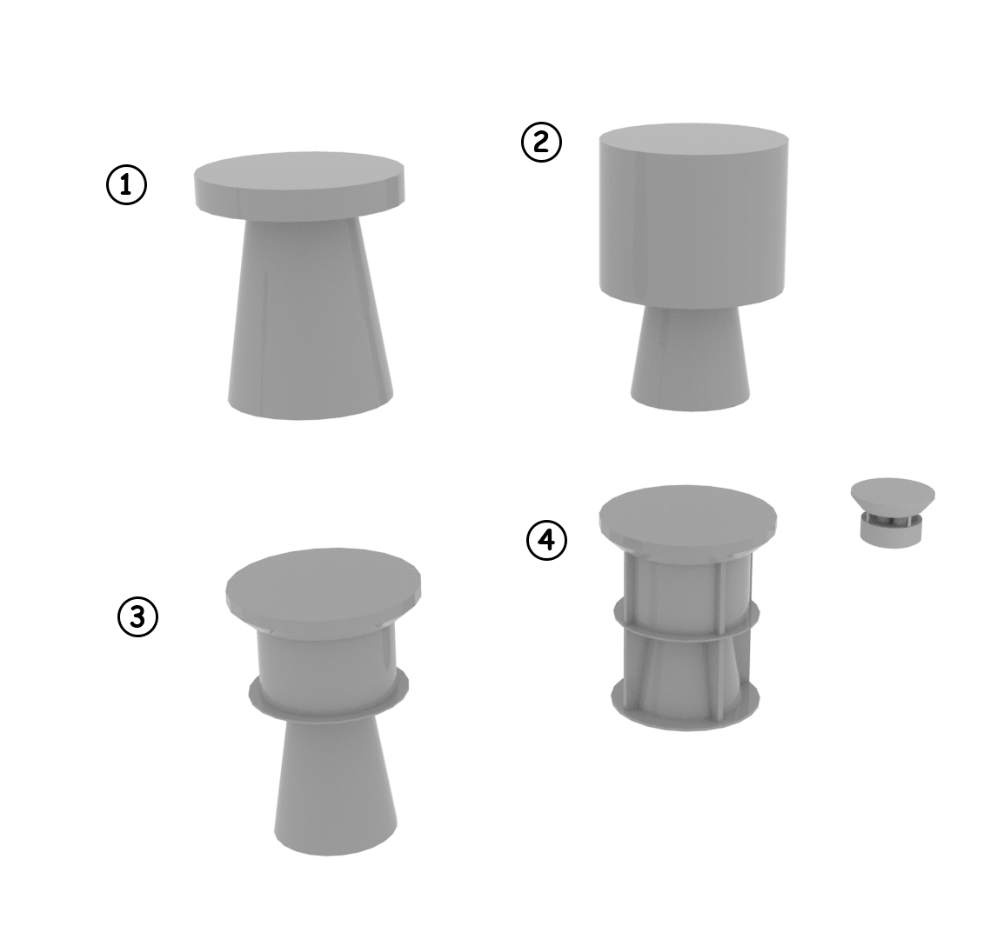
Starting from the high-level concept (1), I felt that this was too basic, and the profile wasn’t particularly unique from other engines. It also had poor commonality with the nearest equivalent, the Dawn engine which returns from KSP1. Going for a more cylindrical shape (2) seemed the most interesting. We’ll place capacitors and power conditioning equipment in that area (3) to call back to the distinct two-section design of the Dawn. Based on the research we did earlier, the magnetic nozzle will need some power transmission and support struts, so adding some vertical connections will help with that (4). This will be the approximate silhouette of the model for detailing. I’ll work with our art and creative team to ensure that we are all on the same page and are happy with the result of the part.
Depending on the part’s complexity, it could be time for another detail pass, with me going back to the reference material for more… reference. The goal here is to get to a detail level that represents the engineering reality of the part and provides a good base for the part art team to go in and make it look great.
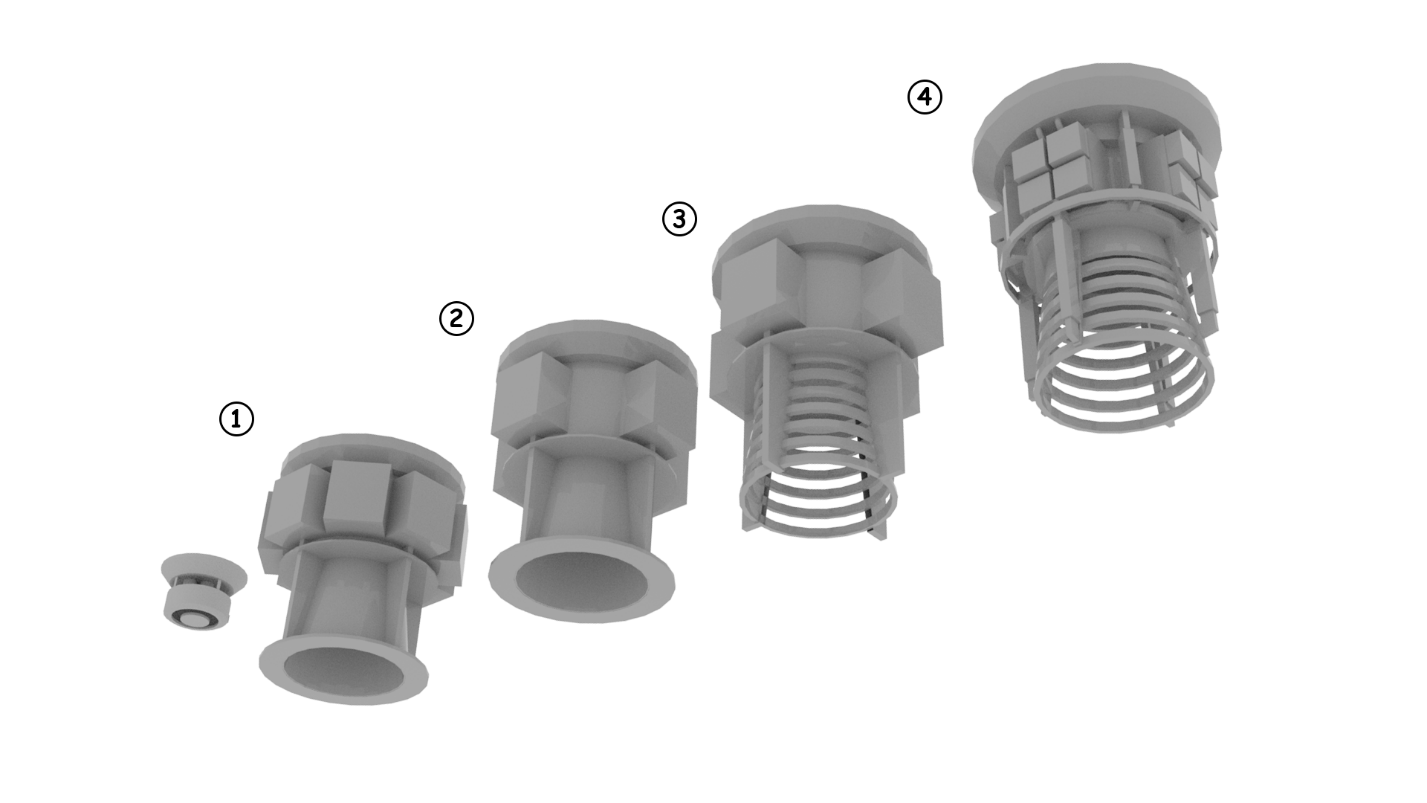
As we can see, I build up the area around the power conditioning, going back and forth on how many boxes I want (1/2). Then, building out the magnetic nozzle and finalizing the overall shape (3). Lastly, another layer of detail completes the whitebox (4). Now I’m pretty happy with it!
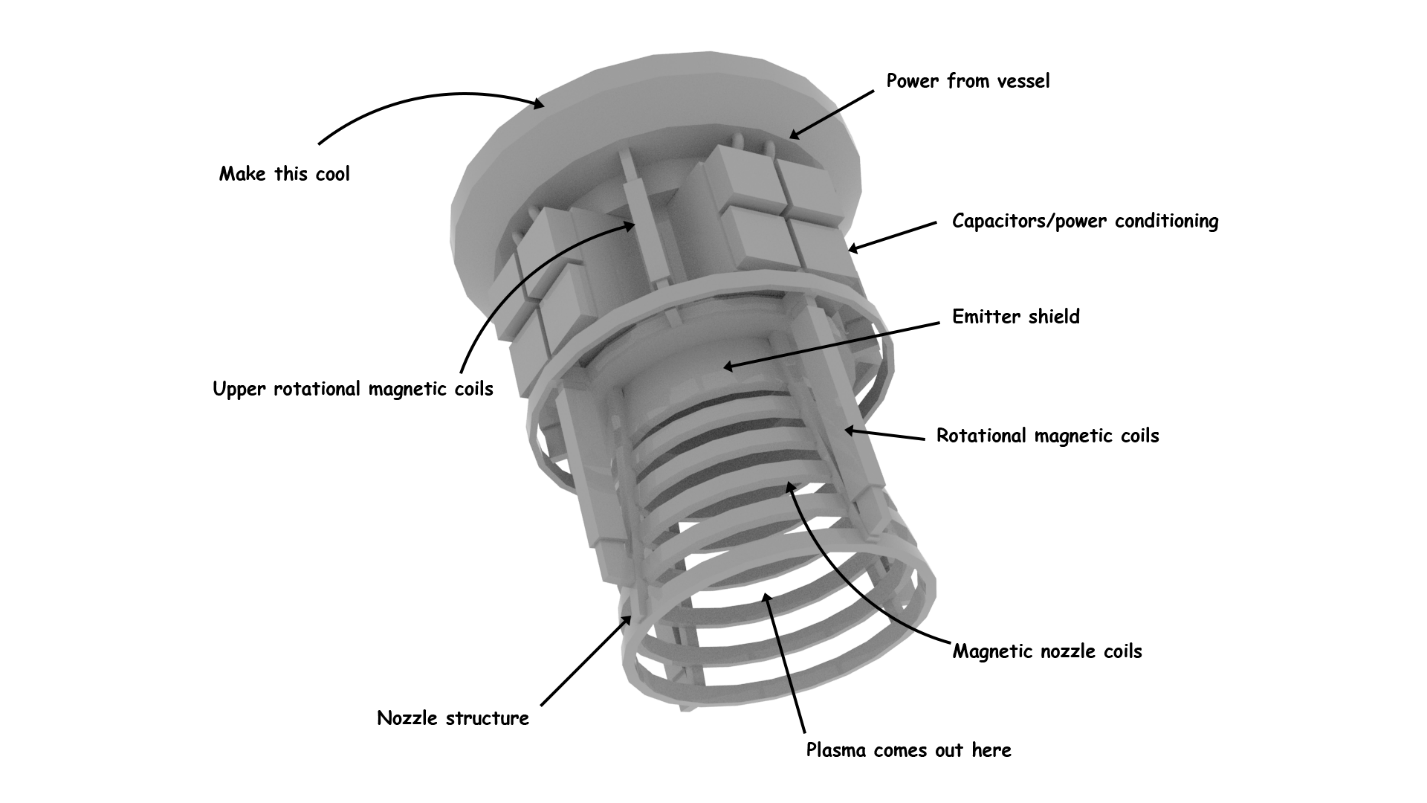
At the end of this phase, we have a concept model to hand off to the art team. This model comes with a set of rough annotations to tell artists where they may want to add (or remove) detail, as well as describe the functioning of the part. Because we want to stay realistic, this whitebox should come with a ton of reference for materials, mechanical diagrams, and the like.
Who Parts?
I’ve mentioned a lot of teams in this process, from Design, through Engineering, Art and QA, so to me, the answer to the question of ‘who parts?’ is pretty clear – it’s everyone!
